
I wrote this article back in 2005. It�s very outdated, but has some good information for retro computer enthusiasts. I�ve left it here as a historical artifact in the hopes that someone finds the information useful�
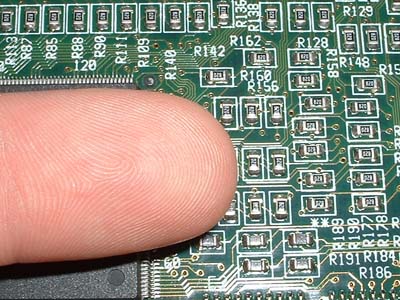
Unfortunately ‘Blueberry’ doesn’t get much use these days. (I suppose it doesn’t help that I have it sitting next to my gaming box..) With that in mind, and being excited to attempt another micro-soldering project I went ahead with the procedure. I initially went for a 100Mhz overclock (which didn’t work) and when that failed, I dropped back to a 50Mhz overclock. The second attempt worked, but it wasn’t without difficulty. While removing the 3 resistors I nearly lost 2 of them due to them suddenly snapping out of the electronics tweezers I was holding them with. To give you an idea of just how small these things are, take a look at picture below. This is my index finger next to some surface mount resistors on an old video card. These are about 3 times larger than what I was dealing with on the iMac system board. Yea, they’re really small.

Update: 05/22/2006
Overall, the iMac overclocking mod hasn’t done a whole lot to get me to use it more. The recent addition of more system memory has improved it a lot. The one remaining problem with it didn’t show itself until I decided to get the iMac folding. This will require some explanation to those who haven’t heard about the project.
I try to help out the Folding @ Home project at Stanford by putting 4 or 5 of my machines to work running their distributed computing client. The project studies the properties of protein folding in the hopes of better understanding the inner workings of our biological building blocks. In any case, the high CPU load of the FAH client combined with the extra heat output of the overclocked CPU resulted in rather nasty system crash.
As it turns out, under normal conditions, the overclocked G3 doesn’t put out much more heat than it does at stock speeds. However, under full load the temperature increases exponentially. To remedy this situation, I decided to add some airflow to my venerable iMac. After all, I do still use it from time to time, and I’d like it to stick around for a while longer. (it’d also be good to be able to leave it on and not have to worry about it burning down the house!)
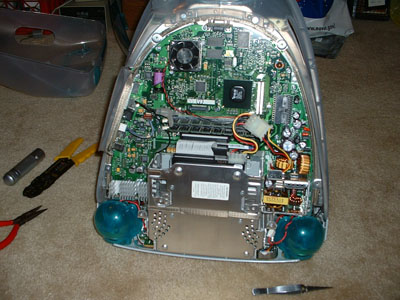
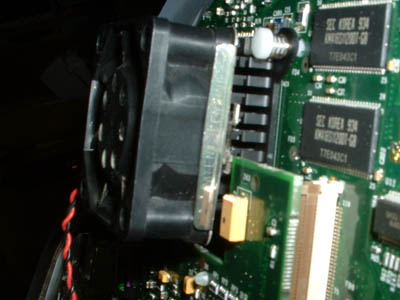
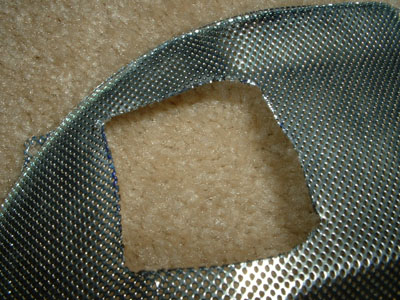
Rummaging through my parts boxes, I found a nice 40mm high-RPM fan that looked like it could do the job. As it turns out, this fan had a mounting clip that with only minor modification was able to hold onto the G3 heatsink tightly. Perfect, only now the case won’t go back together. A cordless drill, a pair of tin snips and 5 minutes later I had a hole in the RF cage that allowed the fan to poke through. I also had to cut into the plastic base plate a bit, but once back together you don’t even notice. Now the only problem is fan noise, but I’ll have to address that another day. 🙂